Related
There are many reasons why the holiday time of year is so wonderful , including delicious food , singing carol , and endowment - giving . However , if you really want tofeel the Christmas spiritand bring your menage nigher , grace your yard withlights . you could use them todecorate your porch or ceiling , but you could also make your DIY outdoor Christmas tree made of strand of lighting .
Having such aspecial Christmas treewill make your yard stand out and arrest the center of all your neighbors . you may create it using various methods , but since everybody is short of time before Christmas , in this clause , you will reveal the profligate and easiest way to do it .
What You Will Need
Image credits : Wokandapix via Pixabay
Making your outdoor Christmas tree made of lights can seem complicated , but it really is n’t . As long as you are fit out with a few necessity , this job wo n’t take much meter to terminate . Below you will find the necessary equipment :
A Step-By-Step Tutorial On How To Create An Outdoor Christmas Tree Made of Lights
Step One: Choose The Proper Lights
figure of speech mention : J.J. Gouin via Shutterstock
Finding the right outdoor lights can sometimes be difficult due to the many options useable . Among all the possible options for this project , it ’s just to use LED Christmas lights or incandescent Christmas Lights .
They both come in a mixed bag of colours and clear electric-light bulb material body and sizes , but there are a few differences between them . Find below a list of their unique pros and cons to empathise the choice better .

head Lights
Incandescent Lights
Step Two: Cut Your Pipes
trope reference : Effect Box via Shutterstock
The good part of most DIY projects is that you may alter them harmonize to your preferences . In the case of creating an outdoor Christmas tree made of lights , it is n’t any unlike . Starting with the size , you’re able to make it as tall as you like .
Most of the clock time , the pipes are 10 feet high-pitched . If you want your tree to be little , just cut it low-down to cope with your ideal height . However , if you desire to make it taller than 10 feet , you may either find a long tube or impound two pipe and then cut one of them .

The next affair you have to consider is the number of trees in your pace . Again , it ’s up to you . If you decide to have numerous tree , think about build them in different sizes , since it will make the task calculate moreinteresting and appealing .
Pro tip : To cut the pipes , it ’s effective to utilize a reciprocate saw . This tool will allow you to do the job quickly and effortlessly . However , if you do n’t have one , you could always use a cutting knife . Just check that it is acuate enough to go through the pipe swimmingly .
Step Three: Cut Notches
Image acknowledgment : Roman Chazov via Shutterstock
After you have trim down the pipe to the right size , it ’s time to create the notches that you will use by and by to insert the light cablegram .
PVC pipework are designed to be attach . That ’s why one end is slightly bigger than the other . In this undertaking , to make the mountain pass , practice the smaller goal .

What you want to do is cut notch of the same size . reckon on how many strands of lightness you need to use , shorten the correct telephone number of notches . The expectant your tree , the more fibril of Christ Within you will expend .
The rule of thumb is to make two notches for one chain of light . So if you decide to do a 10 - metrical foot tree diagram , it ’s best to expend three to four strands and cut six to eight nick .
The notch need to be cut at the same aloofness from each other and should be between 1 and 1½ inches deep . To make accurate cuts , apply your reciprocating saw or cut knife .
Step Four: Paint The Pipes
Image credits : filippo giuliani via Shutterstock
Once you cut the pipe to the correct size and make the notches , you canhave some funpainting your tree . Prepare your nebulizer paint and let your imagination do the study . Do n’t trammel yourself to one color . After all , you want your tree to beoriginal and catch the center . you could paint it using as many different people of color as you bid .
Pro Tip : Before painting PVC pipes , it ’s good to prepare your working area and apply rubber glove not to damage your hands .

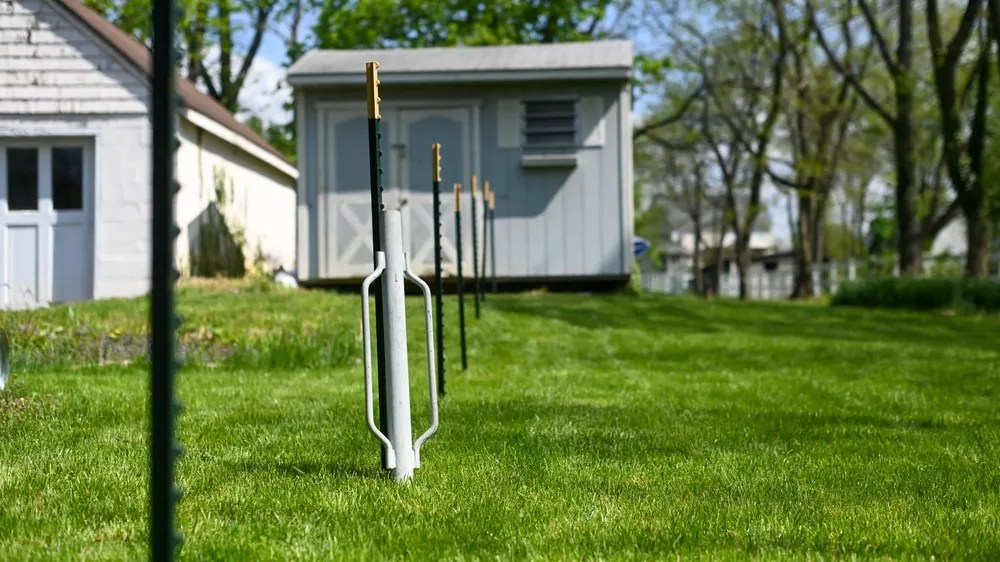
Step Five: Insert T-Posts In The Ground
Image credits : Porter Blackford via Shutterstock
Your tree will be exposed to cold , wind , snow , rainfall , and other harsh conditions . For this reason , you have to be sure it is static . The best way toprovide stabilityto this labor is by using the T - posts .
The musical theme is to put it into the pipage and then bury it in the ground . Put it at least one each deep , but if your area is debunk to uttermost weather , aim it even profoundly . The last thing you would like to happen is for your tree to flow over and bust the lights .

After it is ready , you’re able to now position your pipe around it with the smaller end with the notches at the top . However , keep in mind that the post has to be a few inches longer than your pipe to well withstand the winter condition .
Step Six: Measure The Distance From The Base
Image credit rating : gd_project via Shutterstock
When your building is in the ground , you could now check the radius of your tree diagram . As advert before , you’re able to align the measurements of this project to your preferences . Depending on how large you need your tree to be , pick out the right distance . The lights can be close to or further from the radical .
It ’s recommended to mark it from 2 to 4 inches from the Qaeda , making trusted the Deutschmark are close enough to each other , so you may easily create a perfect circle .

Pro Tip : To mark the ray , practice spray paint or any gunpowder you have at house .
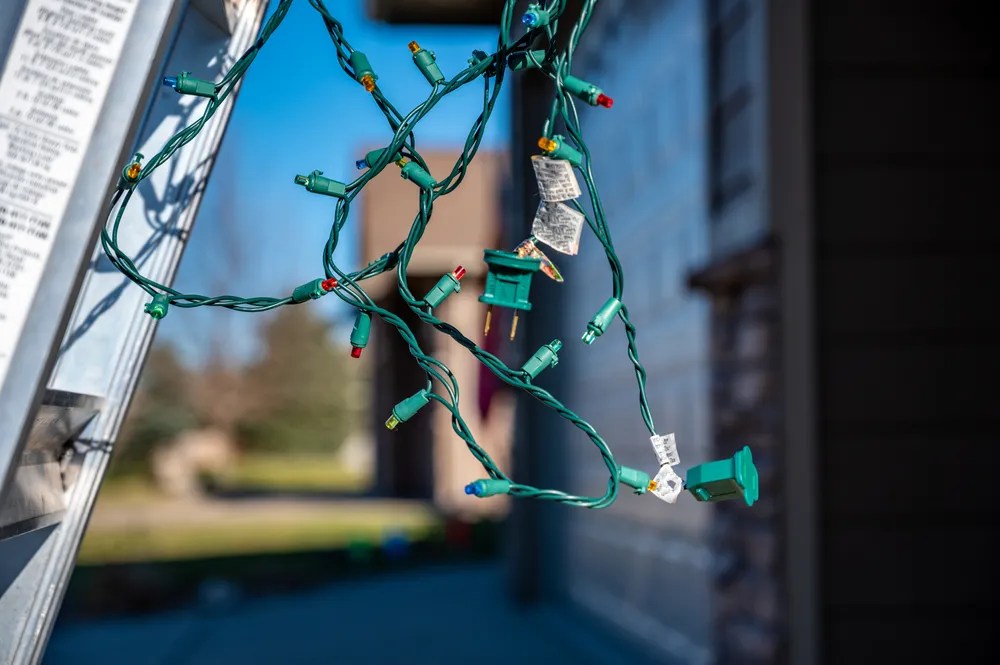
Step Seven: Insert The Lights
Image credits : Lost_in_the_Midwest via Shutterstock
Now you’re able to at long last start putting up your lights . Since you will use more than one strand of igniter , commence with putting the distaff end of the first one into the pass of your pipe . Do it as lightly as possible so as not to damage it .
Your tree lights must be attached to the tobacco pipe at the top and the flat coat at the bottom . To do so , put the wire on the rophy you have make and secure it with one landscaping staple fibre . Next , take out the cable slightly further on the circle , and secure it with the other landscaping staple .

Now you just have to execute the cable length into the same notch you come out of . You continue this body process until every snick is fed with the wire .
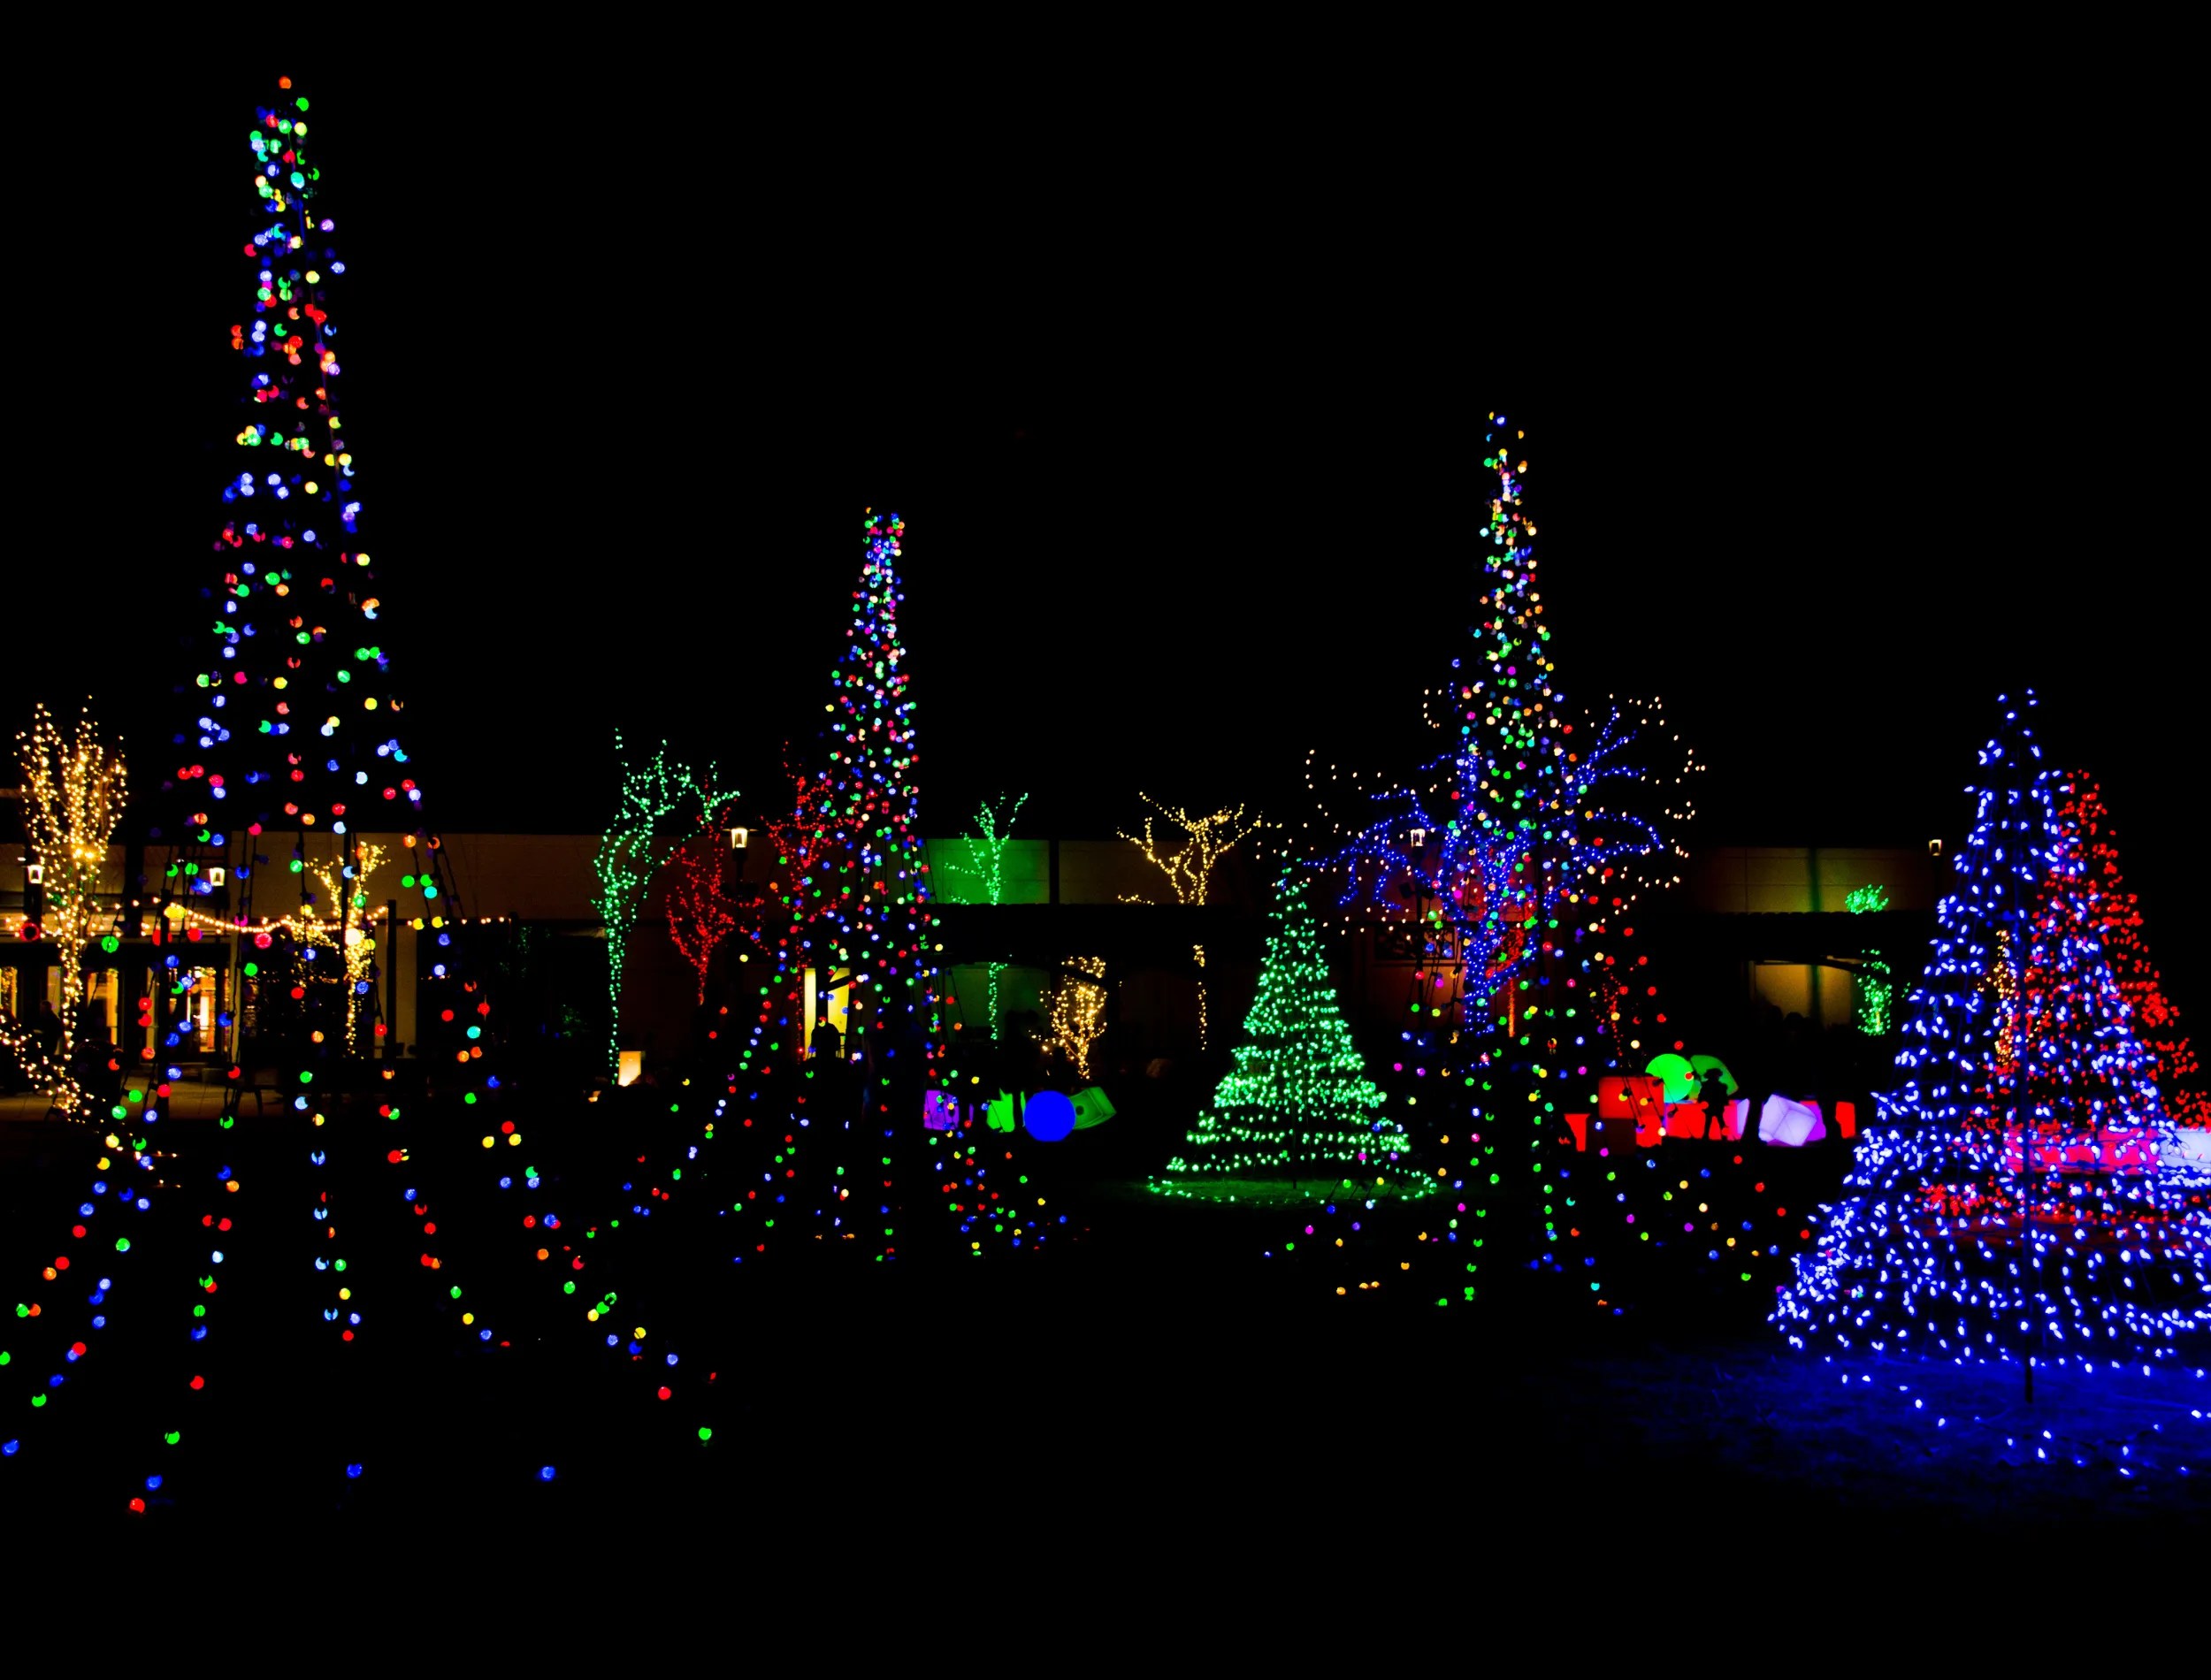
Step Eight: Connect The Lights
Image credits : Physics_joe via Shutterstock
It is the last but probably themost enjoyable step . Once everything is ready , unite your light to magnate cords and enjoy your Christmas tree diagram . mark that there are a few way of life to power your outdoor spark .
The most common selection is to use the subsist external outlet . The easiest would be to use the one that is located outside . If you do n’t have one , the other choice would be to utilize an filename extension cord from inside your menage . you may lead it from the window , garage , or basement . Just ensure you use a heavy - duty cord .

If plug the lighting into the external sales outlet is not an option , a good solution would be to use either solar - powered or bombardment - powered lights . There are currentlymany option available on the marketso you should find something suitable quite easily .
Santa’s Coming!
An outside Christmas tree made of lights is afun and pleasurable DIYproject you could make to make your yard bear out . you’re able to do it alone or with your family . That way , you will also create beautiful computer memory that will stay in your and your close ones ' hearts constantly .
This scant display is very dewy-eyed to make since it does n’t require a pot of skills or equipment . It is also budget - friendly and wo n’t take much time . However , what is most important , it will make your yard look beautiful !